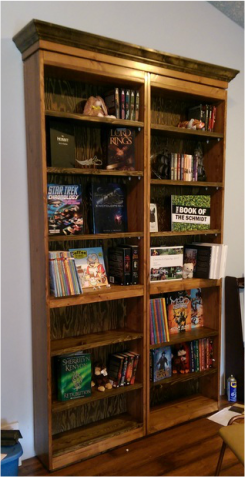
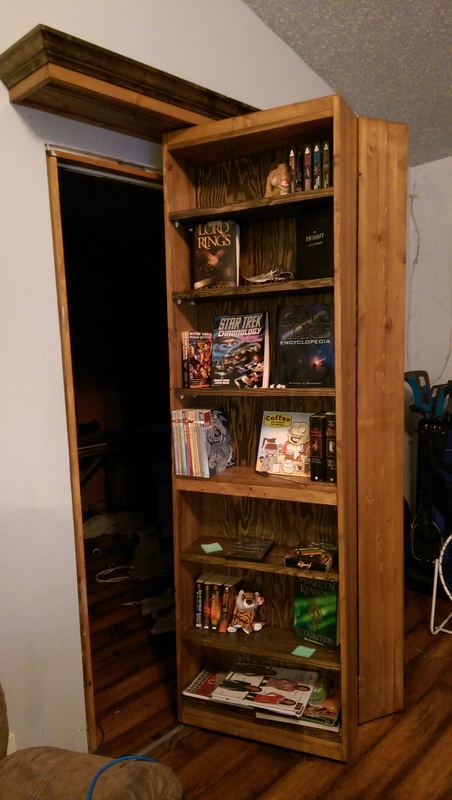
 Finished Secret Bookshelf door.
 I saw this post on tumblr one day, a picture post with a variety of secret/bookshelf doors. Like many people, I immediately thought, that's pretty cool, but I don't have a space where it would be useful. Except, well, I did. I have this opening into a small den, just off of the living room, where the doorway is an odd size, and I'd have to modify a regular slab door to fit. Not that all rooms need doors, but it's nice to be able to hide away the den when it's a mess, or when I'm working in it late, and someone is watching TV. I can shut the door. Anyway, when it occurred to me that I actually had a space where one of these bookshelf doors could be both beautiful, and functional, I got quite motivated to make this happen.
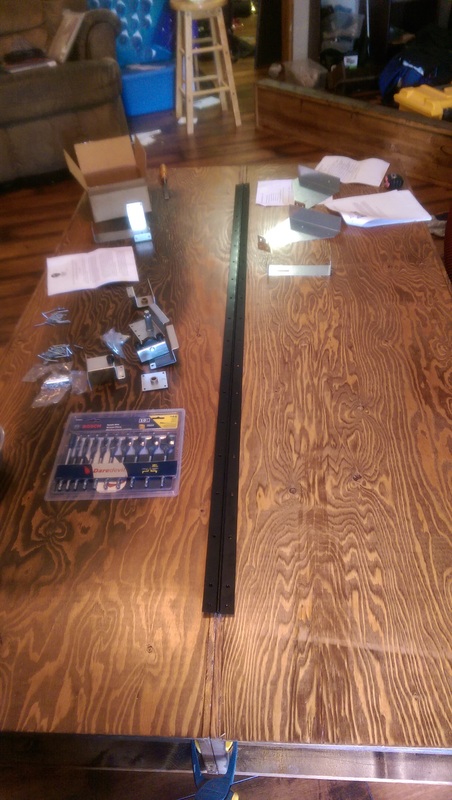
I spent several days doing the research, checking DIY sites and manufacturers, and ended up settling on the Surface Mount Hardware Kit from www.themurphydoor.com.
Finding the hardware here in Canada took a stroke of luck. Fortunately I happened upon Lee Valley Tools again, the same place I sourced the locking hinges for my sewing cabinet project.
I learned a lot during this process, and I'm going to share a few tips.
Do research, look at lots of pictures, learn how things are built. I found a couple tutorials online, a very good one HERE.
Tip #1
Open the Hardware box & make sure the hardware kit you are using matches your instructions. Realize your instructions are made by humans and may have errors. Mine did. I downloaded the current assembly directions off of the website, and from the instructable. But I did not have the most current hardware. The kit Lee Valley carried is an older model, with different directions. This doesn't matter much actually, but knowing it up front will save you needless panic later. The very simple solution, is to continue using the most current instructions with a few minor modifications. The fixes for the errors in the directions are: valance sides should be 8 5/8" wide (9 3/8" listed is wrong) and the Valance back should be 3 1/2" high. (2 1/2" listed is wrong) The directions also recommend installing wood gussets, instead of using the metal ones in the kit. They aren't included in the cut list though. I didn't know at this point that metal ones wouldn't fit (old kit remember). The newer construction instructions render those nearly unnecessary though.
Tip #2
Make sure, when building your frames, at each step, that your frame is Square. I didn't do a good job of this to start, it only occurred to me when I was building the valance and one of the boards was slightly warped to use my father-in-laws square brace & clamps to hold everything while I glued & screwed the boards together. A square brace looks like a 1x4 corner of a picture frame, but you can clamp it to inside or outside corners to keep them in position while you attach pieces. If your frames aren't square, then your bookcase won't open and close properly. It will still look nice on the wall, but it won't function as well as you'd like.
Tip #3
Have the lumberyard cut your 4 x 8 sheet of 1/4 plywood for you. This is much easier than trying to manipulate it yourself. There is only a couple of cuts to make here, but it will make it easier. Also, For not much more than the cost of good 2-side plywood (which wasn't available locally) and the banding, you can get 8' laminated pine project planks. Your shelves won't be as deep, but it doesn't affect the assembly at all, and looks much nicer.
Troubleshooting Installation Note: Make sure you have all the screws in the bottom rail screwed down. If the door has trouble opening & closing, one of the guides may be catching on a lifted screw. Oops. I have a few chunks missing out of one of my guides now. :(
Tutorial / Guide / How I made this awesome door is below the Read More.
Tutorial / Guide / How I made this awesome secret door
For this project you will need:
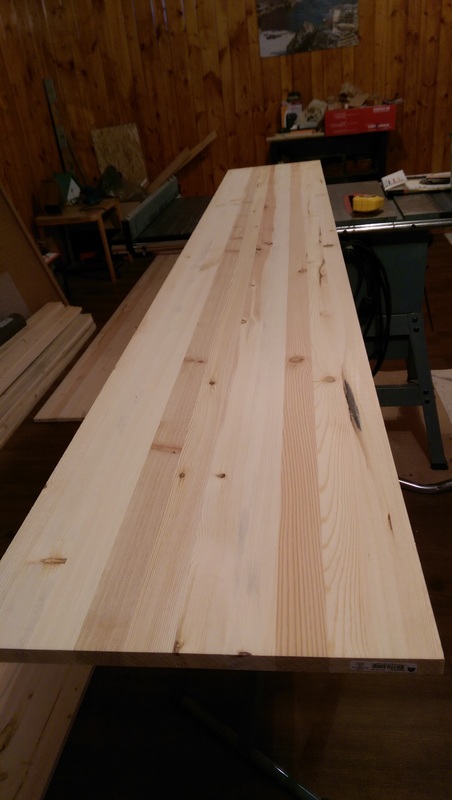
3 laminated pine planks 3/4" x 16" x 96"(8ft) (for sides, top, bottom & middle fixed shelves)
1 pkg (you only use a few boards) 1/4 cottage grade 1/4" pine panelling (for adjustable shelf trim)
5 pine boards 1" x 8" x 8' (for adjustable shelves)
(Be sure to check your wood at the lumberyard. Look for straight boards, avoid those with warping, bowing & crowns) Good wood can be hard to find.
Crown molding around 8'
5 pkg 5mm Shelf supports 8/pkg - you need 20 per unit, 40 supports total.
Carpenter's wood glue.
2" wood screws (like for decks) - about 1 lb of these
1/2 lb of 3/4" to 1" finishing nails.
Optional: 1/4" pin dowels. 1 1/4"
Wood filler - get something stainable / paintable.
2 quarts stain & 2 quarts clear sealer (I like Varathane diamond satin finish acrylic - water clean-up)
Variety of sandpaper 120, 180, 220, 320 grits
Couple of paint brushes & a bunch of rags. If you are using oil based stains, get natural bristle brush, If you are using water-based, get synthetic ones. You'll end up with fewer bristles stuck in your finish. :) Use some of your scrap pieces of wood to do stain tests after, before you stain your project.
TOOLS
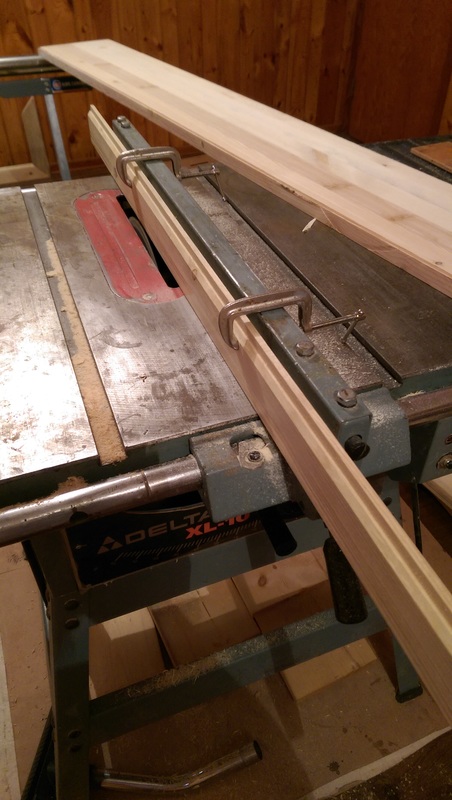
Table saw - can't do this without
Roller Stand - for the table saw if you don't have a helper, this will be necessary
Mitre Saw - you'll need this too, You could use a circular saw in a pinch, if you are really good with one.
Drill - I prefer a cordless one.
Countersink pilot drill bit - No. 6 (a bit pricey, but I picked up one just for this project. Super handy)
Electric Palm Sander - Oh yeah, doing this by hand is a huge pain
Optional:
A couple smaller clamps, and a Square corner jig (you might need to build this before you get started.
Building the Secret Door Bookcase (Murphy Door)
1. Prepare Component A: Side Verticals (Cut sides Lefts & Rights)
A) Cut 2 project panels in 1/2 with the table saw so that you end up with 4 pieces measuring 7 7/8" These are left and right side verticals.
B) Cut each panel with mitre or circular saw to 83" long
C) Cut rabbets 1/4" by 1/4" into one edge. Tidy the rabbets with chisel and sandpaper. This will be the back edge of each panel, and provides a ledge for the 1/4" plywood to sit flush with the back without being visible.
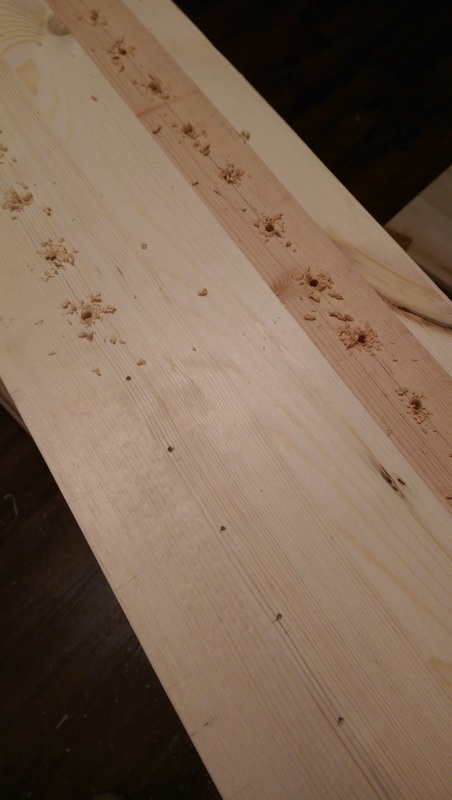
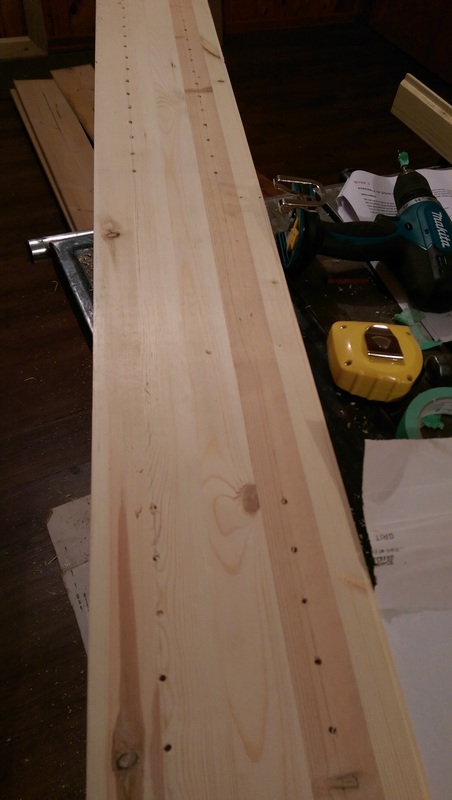
D) Mark holes for adjustable shelving. Measure up from the bottom 36". Fixed Shelf F will center here. Measure 3/8" on each side & Mark F. These will be the edges of Fixed Shelf F. Mark lines 1 3/4" from front edge, and from inside edge of rabbet. From the "top" side of F, measure 8", then mark holes at 1 1/2" for the next 27". (about 19 holes per row). Then from the "bottom" side of F, Measure down 8" and mark every 1 1/2" for the next 18" or so (about 12 holes per row) You can add more holes than this of course if you want. But I figured the minimum I'd want for paperbacks is about 8"


2. Prepare Components F & H
These need to be 1/4" narrower than your side panels A. We will cut them to 7 5/8"
Cut the last 16" x 8' project panel as follows:
A) 1 long cut 7 5/8" (use the table saw). Cut this strip into 4 pieces 23" long (use the mitre or circular saw). From the remaining wider strip, we will cut the last two shelves, and a section to be used later for the valance bottom.
B)Cut two 23" pieces from one end of this remaining wider strip. Then use the table saw to trim them to 7 5/8" This should leave you with a couple of smaller scrap pieces, and a piece around 8" x 49-50"
C)From one of the 1/8 boards, cut 6 shelf aprons 23" x 1 5/8"
Note: Apparently around this point, I quite making notes as I went. Ooopsy. So the rest is just running off of my memory, and the diagrams included with the Murphy door installation guide pdf as given on their website, with above changes to the valance as noted.
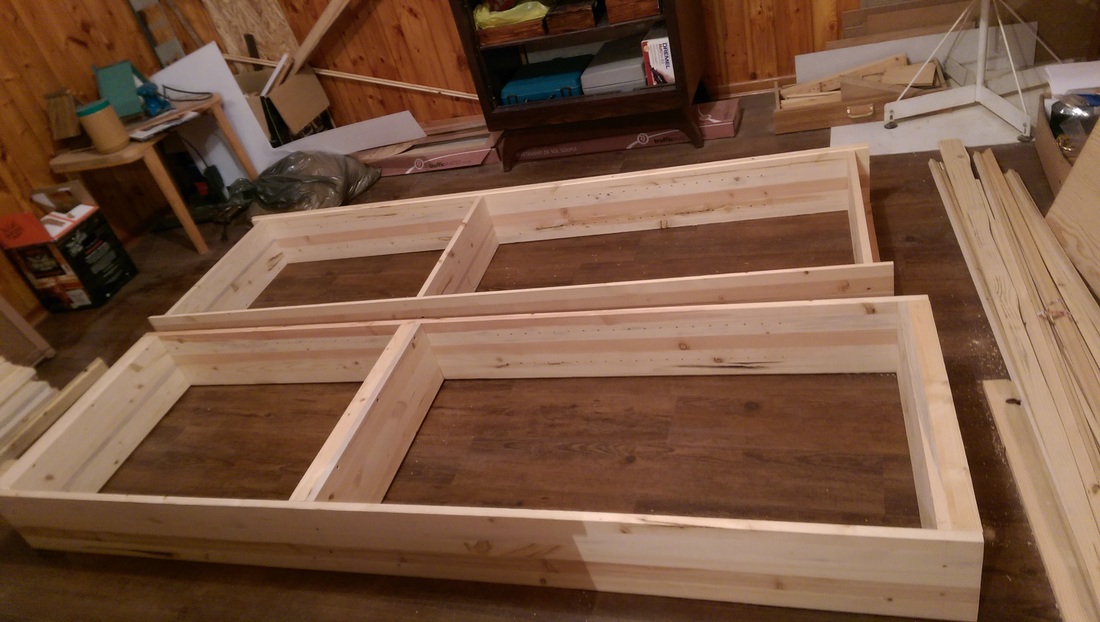
D)Using the square jig & clamps, fasten the shelf aprons to the shelves. Drill the holes with the pilot bit, remove clamps, apply glue, reapply clamps, and screw into position.
E)Using the square jig & the clamps, (Drill for dowels if you wish. I did, but I don't think it's necessary) Attach the shelves to the side panels following the measurements given in the directions, ensuring that the entire assembly is square. (I kind of didn't do that. wish I had, turned out to be kind of important)
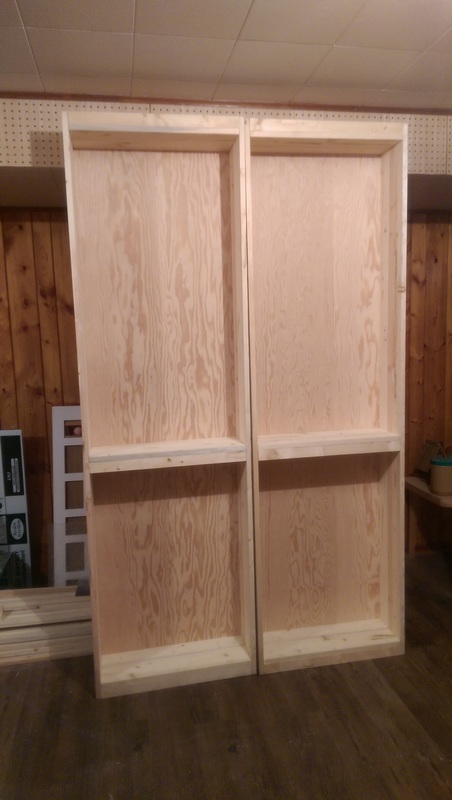
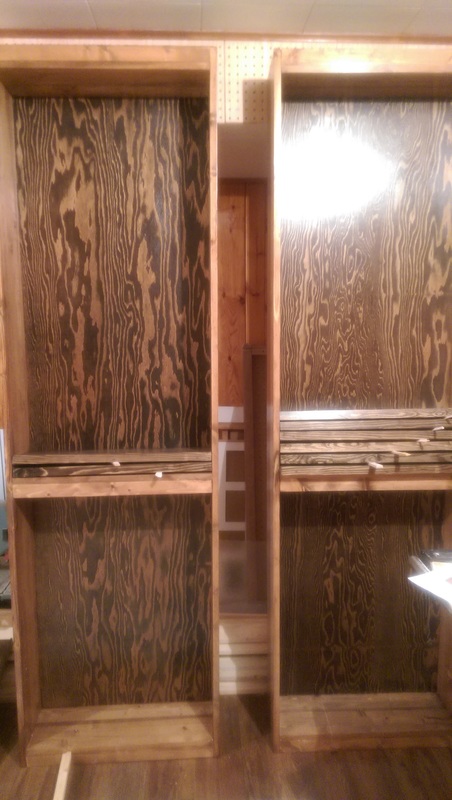
Prepare back.
If you didn't get the back cut at the hardware store, grab a friend and do that now. Make sure the good side (some-times there is only one) faces the shelves. Settle into the rabbets and fasten with glue & finishing nails

Prepare Shelves.
Cut the 1 x 8 boards into 12 shelves (just a hair under 23") 22 15/16"
Cut some of the 1/4" paneling into 1 1/4" strips x 22 15/16" (Strip)
Prep each shelf by running one edge through the table saw to square it up. Glue & nail the strips to the front of each shelf, giving each shelf a small lip. This will help keep items from sliding off.
Prepare the Valance
The plans are a bit confusing, keep in mind the following changes. The Valance sides should measure 3/4" x 2 3/4" x 8 5/8", and the back should measure 3/4" x 3 1/2" x 47 1/2". The directions as given Do not require you to dado the base, it fits quite snugly as is, and with glue and screws will be quite secure. If you choose to use dados, you will have to adjust the measurements accordingly.
A) Butt the Sides (part D) into the Face (part E) (as shown in plans) Using square jig & clamps, fasten together, drill pilot holes, remove clamps, apply glue, re-apply clamps, and screw into place.
B) But the back (Part K), between the sides (part D) and repeat attachment method.
C) Measure up 3/8" from the bottom, and insert the bottom (Part L) leaving this 3/8" gap at the bottom of the box. This will conceal your hardware.
D) you could use upper wooden gussets (not included in the cut list, but since at the time, I had planned to use the metal ones in the hardware kit, I didn't use them. Since the metal ones didn't fit, I could have put a couple of them in.
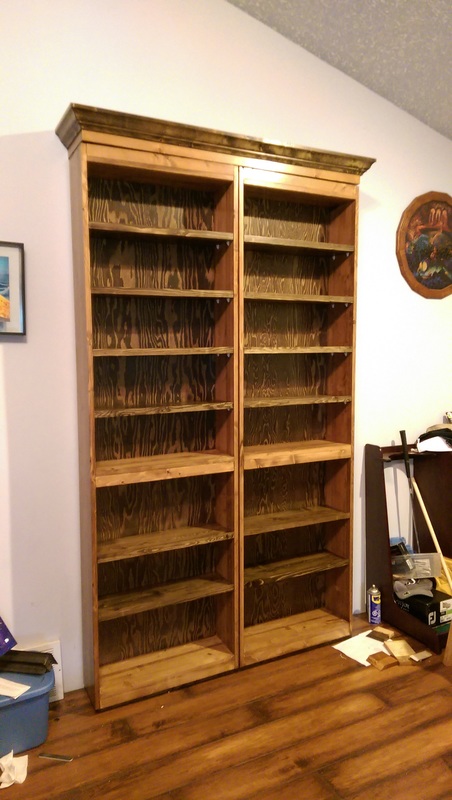
Measure and Cut your crown moulding. This is tricky. Very tricky. Watch a couple of you-tube videos for tips, and be prepared to go back to the hardware store for more when you screw up.
Finishing your Door.
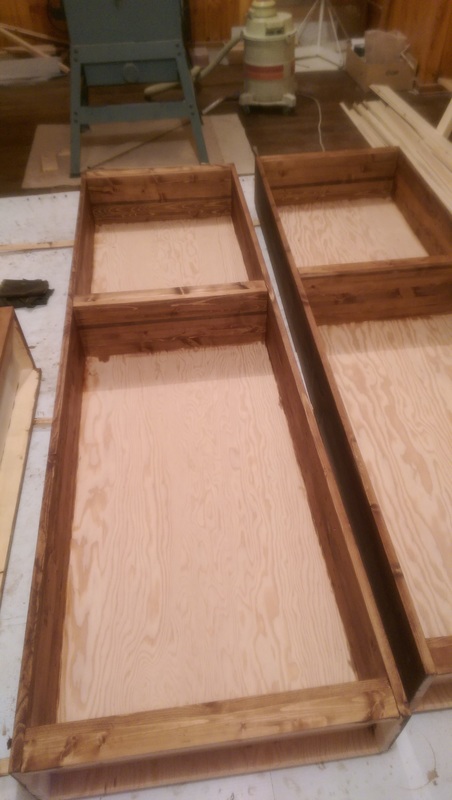
This step took a remarkably long time. Sand, sand sand, with successively finer grits. Clean up. Stain, dry, stain again. (if necessary, you did some test strips on your scraps right?)
I used contrasting stain for the shelves, back & valance, and a different stain for the body of the unit.
Wait a couple of days, then apply your clear coat, sanding lightly between coats. Apply at least 3-4 coats.
Take your bookshelves home & install according to directions.
Congratulate yourself with a hearty pat on your back. You've made a fantastic multi-functional piece of furniture! Great job.
Cut the 1 x 8 boards into 12 shelves (just a hair under 23") 22 15/16"
Cut some of the 1/4" paneling into 1 1/4" strips x 22 15/16" (Strip)
Prep each shelf by running one edge through the table saw to square it up. Glue & nail the strips to the front of each shelf, giving each shelf a small lip. This will help keep items from sliding off.
Prepare the Valance
The plans are a bit confusing, keep in mind the following changes. The Valance sides should measure 3/4" x 2 3/4" x 8 5/8", and the back should measure 3/4" x 3 1/2" x 47 1/2". The directions as given Do not require you to dado the base, it fits quite snugly as is, and with glue and screws will be quite secure. If you choose to use dados, you will have to adjust the measurements accordingly.
A) Butt the Sides (part D) into the Face (part E) (as shown in plans) Using square jig & clamps, fasten together, drill pilot holes, remove clamps, apply glue, re-apply clamps, and screw into place.
B) But the back (Part K), between the sides (part D) and repeat attachment method.
C) Measure up 3/8" from the bottom, and insert the bottom (Part L) leaving this 3/8" gap at the bottom of the box. This will conceal your hardware.
D) you could use upper wooden gussets (not included in the cut list, but since at the time, I had planned to use the metal ones in the hardware kit, I didn't use them. Since the metal ones didn't fit, I could have put a couple of them in.
Measure and Cut your crown moulding. This is tricky. Very tricky. Watch a couple of you-tube videos for tips, and be prepared to go back to the hardware store for more when you screw up.
Finishing your Door.
This step took a remarkably long time. Sand, sand sand, with successively finer grits. Clean up. Stain, dry, stain again. (if necessary, you did some test strips on your scraps right?)
I used contrasting stain for the shelves, back & valance, and a different stain for the body of the unit.
Wait a couple of days, then apply your clear coat, sanding lightly between coats. Apply at least 3-4 coats.
Take your bookshelves home & install according to directions.
Congratulate yourself with a hearty pat on your back. You've made a fantastic multi-functional piece of furniture! Great job.

 RSS Feed
